Windows 10 Home & Pro (Activation Guide)
Here we'll walk you through how to reinstall or reinstall Windows 10 with a USB stick. To follow our guide, you'll need a USB flash drive of at least 8GB.
If you only need to activate Windows 10 and don't want to reinstall or re-install, you can click here for product key activation instructions.
However, if you don't have Windows 10 installed on your computer, you'll need to do a fresh install, simple step-by-step instructions are below.
INSTALL WINDOWS 10 WITH USB DRIVE
In this article, we will show you how to do a fresh installation of Windows 10 with USB memory on your computer. Make sure you have a USB stick of at least 8 GB and move any data you don't want to lose from the USB stick.
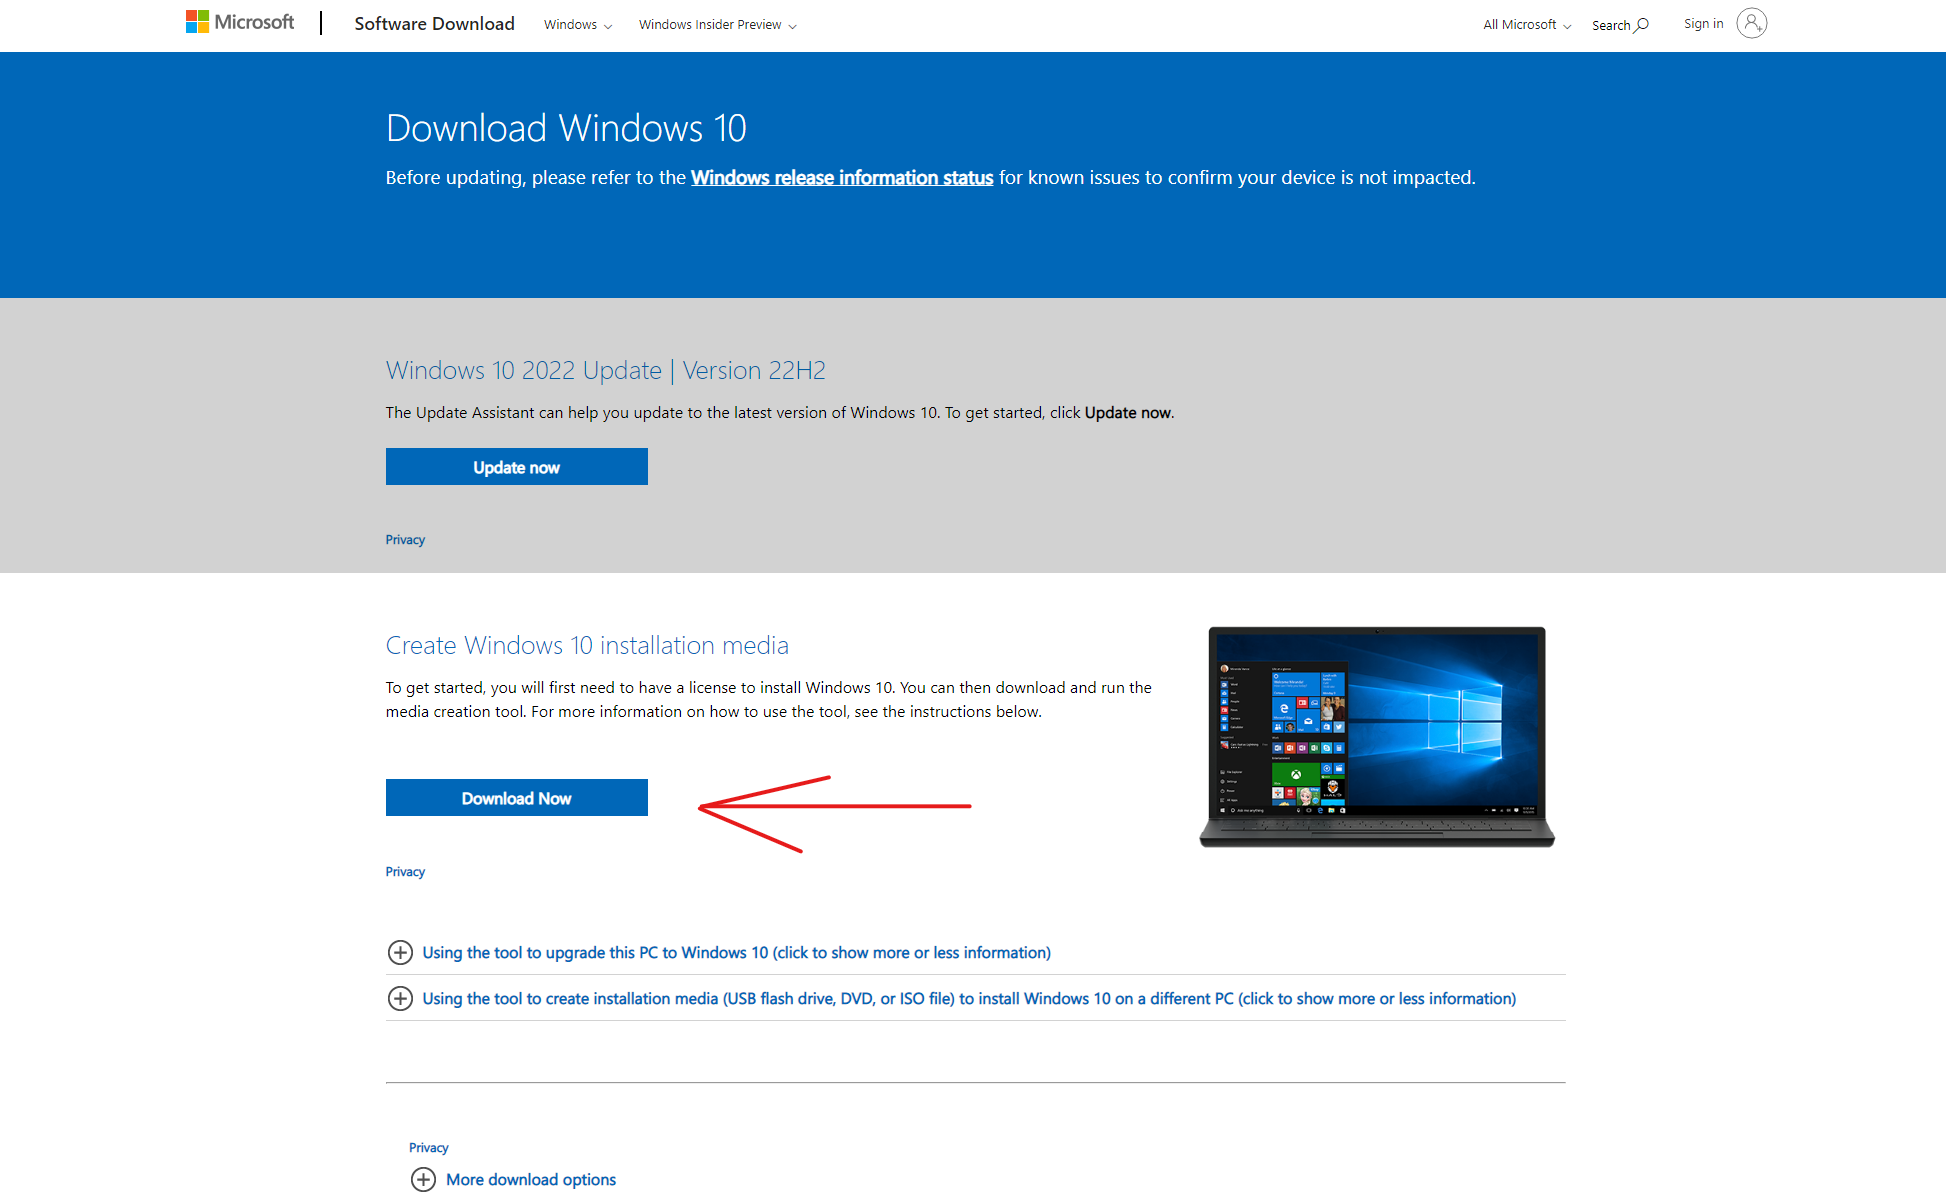
STEP 1: Download Windows 10
Start by clicking on the link below to go to Microsoft's official page where you can download Windows 10.
STEP 2: Open the tool
Once the file has been downloaded to your computer, you can right-click on it. Now select Open to open the tool.
STEP 3: Accept the license conditions
To proceed, you must accept the license terms of the tool. To do so, click Accept.

STEP 4: Create installation media
Now you can reinstall on the computer you're currently using or choose to install Windows 10 on a new computer. Click in Create installation media, and then click Next.

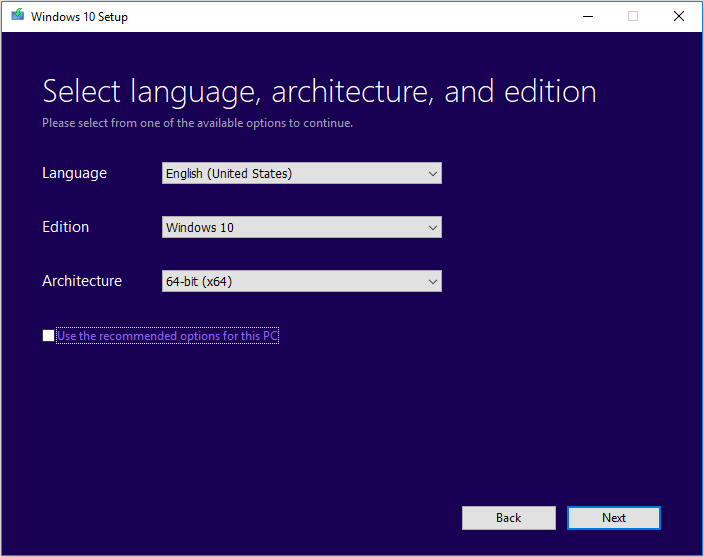
STEP 5: Choose language
Now you can choose the language, edition, and architecture you want. Recommended settings for most computers are English as the language, Windows 10 as the edition, and 64-bit (x64) for the architecture. When you have finished making your choices, click Next.
STEP 6: Installation file on USB flash drive
Now you should choose to put your Windows 10 installation file on your USB flash drive. Then click Next.
 STEP 7: Select USB drive
 STEP 7: Select USB drive
You will get a list of devices that can be moved on as your USB memory stick. Here you select your USB stick and then click Next.
Keep in mind that any files still on your USB stick will disappear at this stage. They should be saved if you don't want to lose the information!
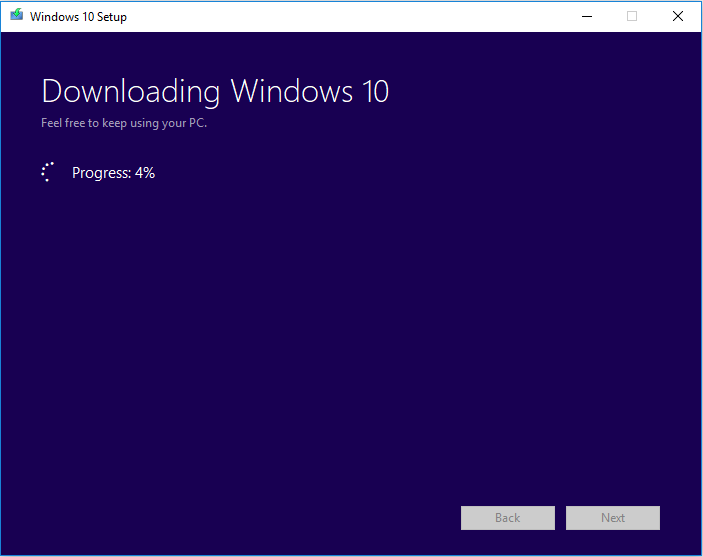
 STEP 8: Wait for the download
 STEP 8: Wait for the download
Now the Windows 10 tool will be downloaded to the USB stick. This may take a few minutes so please wait patiently for it to finish.
STEP 9: Complete
Now your USB flash drive is ready for installation. Click Finish and proceed to the next step.
Now you can install Windows 10 on your computer. Here are the steps you take to install Windows 10 with USB memory.
Installation
STEP 1: Turn off the computer and connect the USB memory
Start by turning off your computer. Then insert your USB memory into one of the USB ports on your computer. Then you can start your computer.
This should cause the installation to start automatically and you can then proceed to Step 2. If this does not happen, do the following to tell your computer to boot from your USB flash drive:
- Start the computer and immediately press DELETE, F2, F8 or F1. You should click several times to reach the motherboard's settings, called BIOS. You should be told which button to click once the computer takes you to the BIOS.
- In BIOS, look up Boot Priority or Boot Order. You should find this in the Settings menu.
- Now click on Boot Option #1 and choose to boot your computer from your USB stick.
- Shut down BIOS and reboot by selecting Exit and Save Settings.
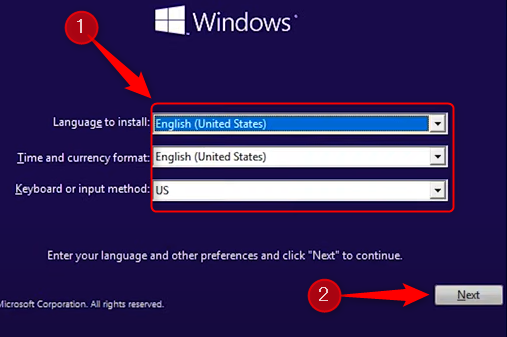
STEP 2: Choose language, time and currency format
Now you need to select the language, time and currency formats. You'll also need to choose the keyboard layout for Windows 10. Next, click Next, and then click Install Now.
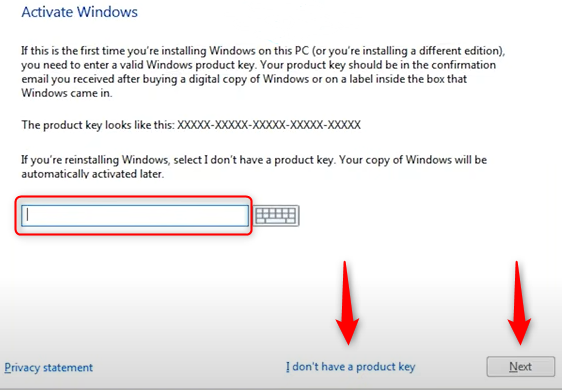
STEP 3: Enter the product key
Now you are asked to enter your product key. You enter the license key that we sent you by email. Then click on Next.
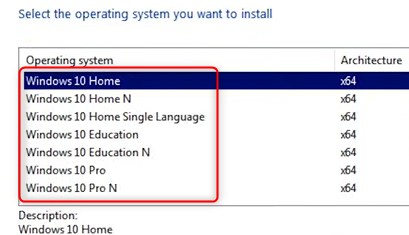
STEP 4: Choose your operating system
Now choose the operating system you want to install on your computer. It can be Windows 10 Pro or Windows 10 Home. Then click Next.
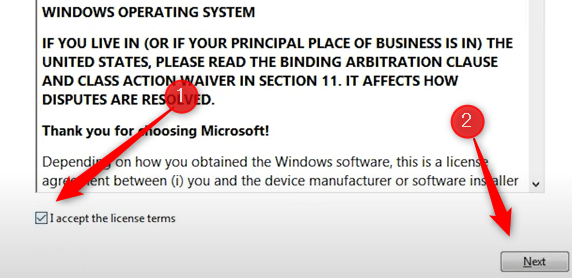
STEP 5: Accept license terms
Now you have to accept the license terms by ticking the option I accept the license terms. Then click Next.
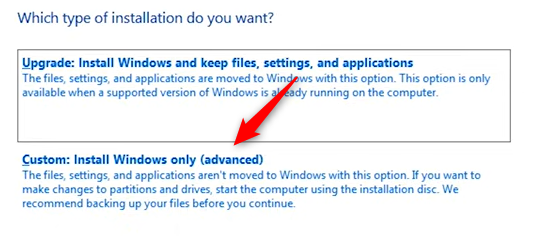
STEP 6: Choose installation
Now choose the type of installation you want to perform. If it's a new installation, choose Custom: Install Windows Advanced only.
STEP 7: Choose hard drive
Now choose an empty hard drive to install Windows 10 on. Click Next to start the installation.
It is possible to choose a hard disk that is not empty. Then select Delete or Format. Then select the hard disk and click on the buttons you see below it.
